Monday 16 December 2013

Hot Buttered Rum


Only a few days till Christmas.  Our house is surrounded by lots of snow, the lights are up, and the blow-up Tigger is waving happily as he comes out of his blow-up Christmas tree... (Our boys love it!)  Our tree is up, and I have Christmas music blaring as much as I can.  Right now I'm listening to a rocking version of the Carol of the Bells by David Crowder.  Rockin'!!!! (it's very therapeutic to rock out to Christmas carols you know....)

And I am slowly thinking about Christmas goodies.

I don't like to rush the whole baking thing....I don't want any extra "gifts" attached to my thighs and stomach this year.  I like to wait to bake....and then let everyone else eat it up!   But my LIST is up on the fridge.  I'm trying a new gingerbread cookies recipe as we speak, Monkey Munch will be made in a few days, David's cookies - though I'm on the look out for cherry flavoring....eeeek., maple fudge, almond roca....and I think this year....Candied Orange Peel.  I think I may be the only one who will eat it though...but I am okay with that. :)

Anyways, one neat thing my husband David and I are doing this year is watching Christmas movies each night whilst snacking on lovely cheeses and sipping on wines...or hot toddys.  We've watched movies like "White Christmas", "Christmas in Connecticut", "Holiday Inn",  "Home Alone", and last night's was "A Christmas Carol - with Patrick Stewarat... HIGHLY recommend!!!"

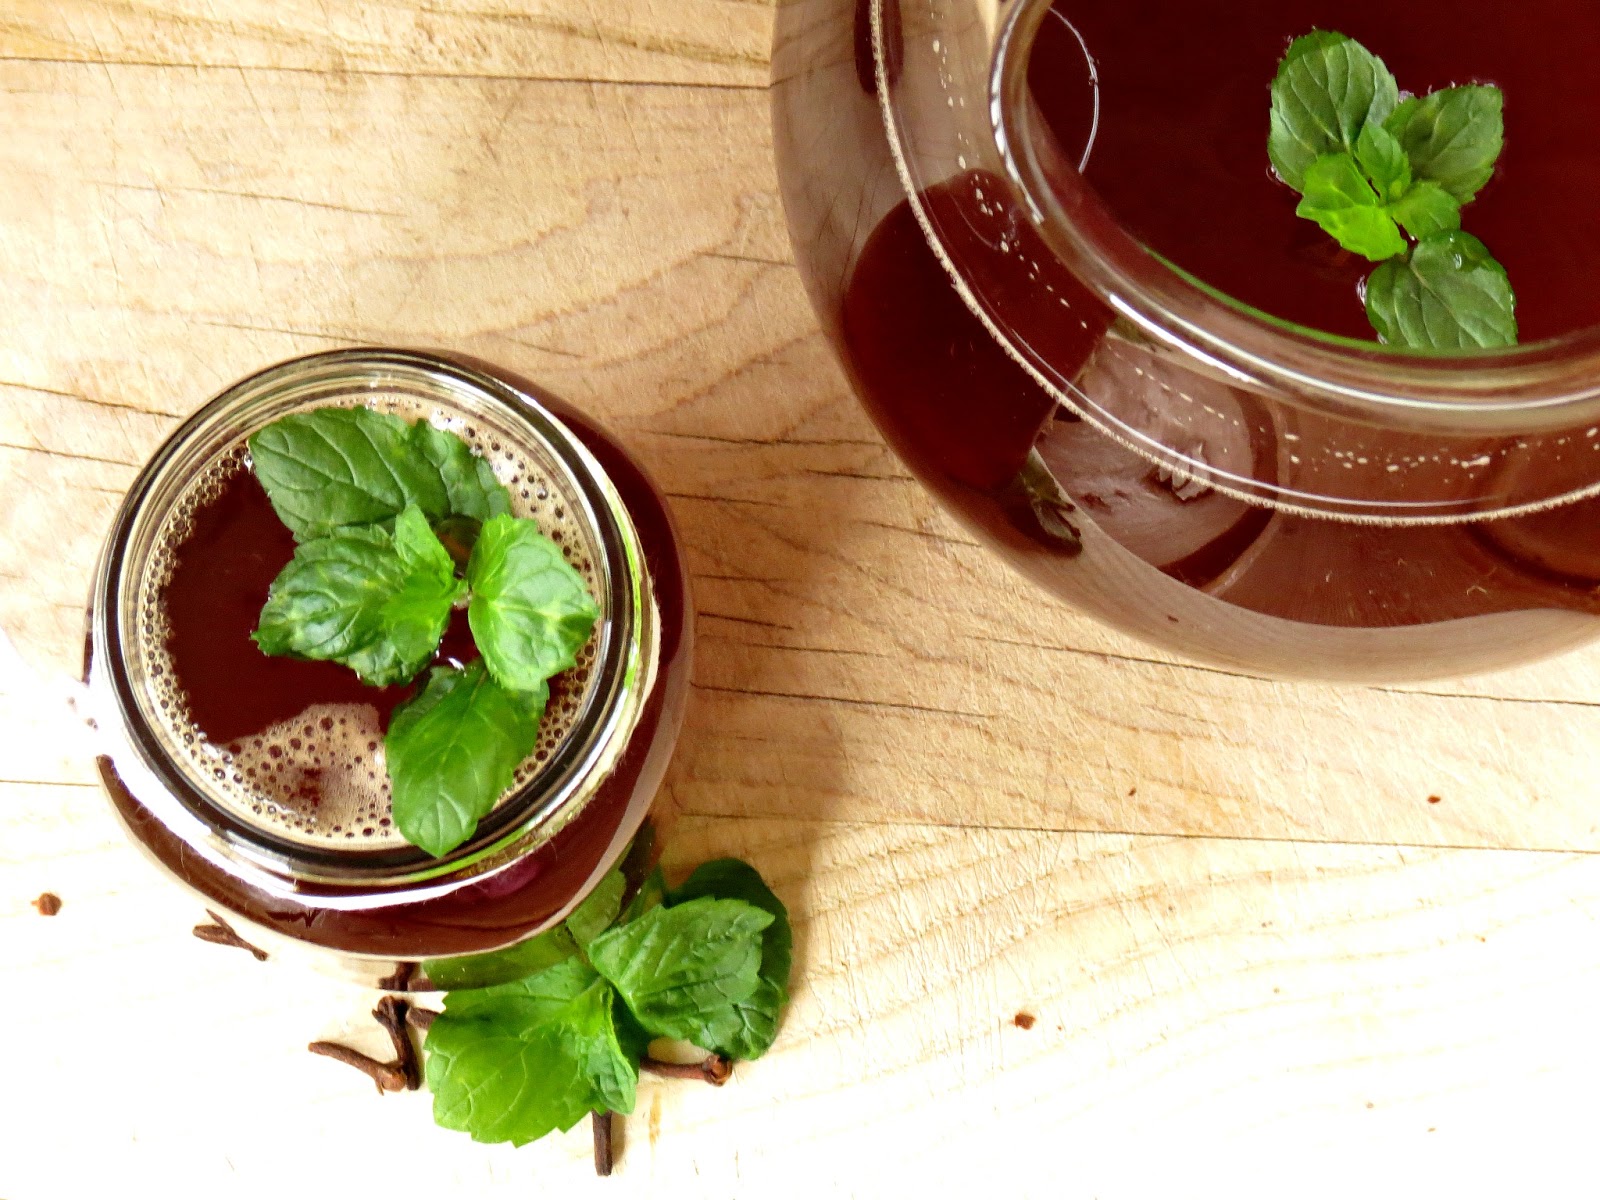
But tonight, I have a new drink to try.  Hot Buttered Rum.  You can buy the mixes at stores, but why not try it with REAL BUTTER!!!  So we are. 

Here's how.  Go pop some popcorn, Catch a Bing C. flick, and sip on this.

Hot Buttered Rum
adapted from: A Thousand Threads

What You Need:

3/4 cup of softened butter ( I used salted...you can use unsalted)
2 cups of light brown sugar, packed
1 tsp of ground cinnamon
1/2 tsp of ground nutmeg
1/4 tsp of ground cloves
1 tsp vanilla extract


Rum (dark or spiced)
boiling water or apple cider

What to do:

1.  Cream together butter, sugar, spices, and vanilla.  Roll into a cylinder and wrap in parchment paper.  

2.  Freeze.

3.  When ready to make, cut of 2 tablespoons of butter mixture and place in a small mug. Add 1-2 oz of  rum and then top off cup with boiling water.  Stir and serve immediately!

Wednesday 4 December 2013

Iced Oatmeal Cookies


We truly just came out of some crazy, crazy weather these past few days.  Lots of snow, wind, and freezing rain....makes for an interesting week.  My oldest has been having "Snow Days" for the past couple of days, and we only ventured forth today....because we needed groceries.

Looking on the positive side to the Great Blizzard...WE WILL HAVE SNOW FOR CHRISTMAS!  Lots o snow....:)  Good thing too, shhh, we got the boys some GT racers.. (Good thing they are not proficient readers yet...that,  and my blog doesn't have Lego or Ninja Turtles in it...so no interest what so ever....)

BUT, the boys WERE interested in these AMAZING cookies.

I will put this out there.  These are my favourite Oatmeal cookies so far.  They were eaten up with great gusto and I have to make another batch here soon.  SOOO GOOD.  Definitely on my go-to list.  So here it is.  Add it to your Christmas baking list.  You will not regret it.  :)


ICED OATMEAL COOKIES

adapted from Mother Thyme

What you Need:

2 cups old fashioned oats
2 cups all purpose flour
1 TBSP of baking powder
half a tsp of baking soda
half a tsp salt
2 tsp of cinnamon
half a tsp of ground nutmeg

1 cup of hard margarine or butter (softened)
1 cup of brown sugar (packed)
half a cup of granulated sugar
2 large eggs
1 tsp of vanilla extract

For the glaze:

2 cups of icing sugar (confectioners)
4 TBSP of milk


What to Do:

1.  Pre-heat oven to 350 degrees.  Have baking sheets prepped with parchment paper or silicone mats.
2.  Place oats into a food processor and pulse for 10 seconds.  

3.  In a medium bowl combine, oats, flour, baking powder, baking soda, salt, cinnamon, and nutmeg.

4.  In a large bowl, beat margarine, brown sugar, and granulated sugar.  Beat until fluffy.  Add eggs and vanilla and beat a bit more.

5.  In small batches add the dry ingredients while you are beating.  Beat until combined.

6.  Using about 2 TBSP of dough for each cookie, roll dough into balls and place onto baking sheets.

7.  Bake 10-12 minutes.  Until golden brown on bottoms.

8.  Remove to cooling racks.  Cool

9.  Make glaze: combine icing sugar and milk and stir to make glaze.

Dip tops of cookies into glaze and allow to set.

Eat with gusto or savour with a cup of hot chocolate.  So yummy!


Saturday 23 November 2013

Citrus Hot Toddys


As the weather is cooler....I yearn for comfort and warmth.  I sit by the fireplace, have a warm blanket around my legs, slippers... Oh so cozy!  I love it!  My husband and I usually spend our evenings this way watching our favorite tv show when the kiddos are asleep.  We usually make ourselves a cracker and fancy cheese plate and have grown-up drink.  And we've discovered.....TODDYS....

And not just a simple toddy of rum, hot water and cinnamon....This toddy takes it up to another level!  Citrus!!!!  I've combined fresh lemon and orange juices, sweet honey, and cinnamon.  Add to that some spirits (we like spiced rum) and some hot water....you have a perfect cozy drink!  This would also be very comforting after a day out on the slopes, or sledding, or shovelling, or staying inside watching everyone else....shovel.....

:)

So, break out a couple of your favorite mugs, mix up these easy ingredients, light a fire (or turn on that fireplace station on tv) turn on some Christmas tunes...(NO ITS NOT TOO EARLY!!!!) and sip this sweet nectar....


Citrus Honey Toddys
adapted from:  Camille Styles

What you Need:
(serves 2)

- juice of one lemon
- juice of one navel orange
- 2 TBSP of honey
- 1/3 cup of spiced rum
- 1 cup plus 1/4 cup of hot water
- 2 lemon wedges
- 2 cinnamon sticks

What to do:

In a glass bowl combine, juices of lemon and orange, honey, rum, and hot water. 

Divide into mugs.  Check to see if its your desired temperature for hot drinks.

Add lemon wedges and cinnamon sticks

Enjoy!


Friday 15 November 2013

Glazed Chocolate Mini-Donuts


So we've finally had our first big snow!  And I am okay with it.....I'm not ready for extreme cold yet and thankfully we've had decent temperatures for our area.  Snow gear is out in full force and we've already had our first mitten casualty....Lost forever in the bowels of the Elementary School lost and found bin....

I gotta go buy some more mittens.  I'm slightly anal about it when one is lost.  I go searching for it...

In grocery store parking lots...

tearing through bins.....

Yep...apparently I've got a problem with lost mittens...

But I don't have a problem with donuts....mini ones to be precise!  I bought myself a new silicone mini-donuts baking pan..So fun..Yes, I could use my mini muffin pans for the same purpose...but mini donuts are so cute!  So to try out the pan I made these sweet babies...And they are GOOOOOOOOD!  Easy to make, easy to eat!  If you don't have a mini-donut baking pan....don't sweat it...use that mini-muffin pan that I know everyone has hidden amongst the  bundt, cheesecake (various sizes) jelly roll, and every size cake pan...

:)

Glazed Chocolate Mini-Donuts

adapted from Buns in My Oven


What you Need:

1 cup all-purpose flour
1/2 cup granulated sugar
1/4 cup of cocoa powder
1/4 cup of mini chocolate chips
1/2 tsp of baking soda
1/2 tsp of vanilla
1 egg
6 TBSP of sour cream (preferably full fat)
1/4 cup of milk
1/4 cup of vegetable oil

For the Glaze:
1 1/4 cups of powdered (icing) sugar
6 TBSP of milk
1 tsp of vanilla

What You Do:

1.  Pre-heat oven to 375 degrees

2.  In a large bowl combine dry ingredients for the donuts.

3.  In a small bowl whisk together vanilla, egg, sour cream, milk, and oil. Once well-mixed, pour wet ingredients into the dry.  With a spatula or wooden spoon stir to combine.  Don't over-mix.

4.  You can spoon batter into a greased mini-donut pan (or mini muffin pan), or you can spoon batter into a piping bag and "pipe" the batter into the pans.  I did this and found it less messy.

5.  Bake for 10 - 12 minutes in oven. 

6.   Remove from pan and cool on rack.

7.  Make Glaze.  In a small saucepan over medium-low heat combine glaze ingredients.  Heat and keep stirring for 2-3 minutes.  Remove from heat.

8. Dunk cooled donuts into glaze and place on rack to cool and allow the glaze to harden.  This may take a bit of time...be patient....:)

Enjoy.

Preheat oven to 375 degrees.
In a medium mixing bowl, combine the flour, sugar, cocoa powder, chocolate chips, and baking soda.
In a small bowl, beat together the vanilla, egg, sour cream, milk, and oil.
Stir the wet ingredients into the dry until just combined.
Spoon in a greased donut pan.
Bake for 8 minutes or until the tops spring back when you touch them.
Let the donuts cool in the pan before glazing.
To make the glaze:
In a small saucepan over low heat, combine the sugar, milk, and vanilla until well combined. Remove from the heat.
Dunk the donuts in the glaze to fully coat and place on a wire rack to set.
Read more at http://www.bunsinmyoven.com/2013/04/01/glazed-chocolate-donuts/#SXgWSlVi51mRZpQB.9

Ingredients:

For the donuts:
1 cup flour
1/2 cup sugar
1/4 cup cocoa powder
1/4 cup mini chocolate chips (optional)
1/2 teaspoon baking soda
1/2 teaspoon vanilla extract
1 egg
6 tablespoons sour cream
1/4 cup milk
1/4 cup vegetable oil
For the glaze:
1 1/2 cups powdered sugar
6 tablespoons whole milk
1 teaspoon vanilla

Directions:

To make the donuts:
Preheat oven to 375 degrees.
In a medium mixing bowl, combine the flour, sugar, cocoa powder, chocolate chips, and baking soda.
In a small bowl, beat together the vanilla, egg, sour cream, milk, and oil.
Stir the wet ingredients into the dry until just combined.
Spoon in a greased donut pan.
Bake for 8 minutes or until the tops spring back when you touch them.
Let the donuts cool in the pan before glazing.
To make the glaze:
In a small saucepan over low heat, combine the sugar, milk, and vanilla until well combined. Remove from the heat.
Dunk the donuts in the glaze to fully coat and place on a wire rack to set.

Read more at http://www.bunsinmyoven.com/2013/04/01/glazed-chocolate-donuts/#SXgWSlVi51mRZpQB.99

Wednesday 6 November 2013

Jiffy Cinnamon Buns


As a busy mom I do appreciate things that are "jiffy".  Things like canned soup, KD, apple sauce, yogurt tubes, and juice boxes.  Yes, even store-bought cookies and microwave popcorn are nice on occasion too.  When you don't have all the time in the world....these things are helpful in a pinch.

That is what I think about cinnamon buns.  I do like....um...love cinnamon buns.....but the time it takes to make them.  They can be.....well.....not so....jiffy.  This can be a problem for the mom who is running to skating, swimming, pre-school, play groups, pick up school kids, groceries, mail, clean,....ya...you get it...I bet you get it REALLY GOOD.  I'm speakin' your language....:_

So there are these babies...A jiffy, biscuit-based cinnamon bun that really takes no time to make...OK...a bit of time....but it is so manageable. So next time you get a hankerin' for some cinnamon bun love.....try these....:)


Jiffy Cinnamon Buns
adapted from Company's Coming


What you NEED:

2 cups all purpose flour
2 TBSP granulated sugar
4 tsp baking powder
1 tsp salt
1/4 cup cold butter or margarine

1 cup cold milk

for filling mixture:

1/3 cup butter or margarine softened
1 cup brown sugar, packed
3 tsp cinnamon

**if you like raisins or currants you can add 1/3 cup to the filling mixture..

What you DO:

1.In a large bowl combine, flour, sugar, baking powder and salt.  Cut in the first amount of butter until crumbly.

2.  Add milk to bowl.  Stir to form a soft dough.  Turn out onto a floured surface and knead dough 8 - 10 times.  Using a rolling pin, roll dough into a rectangle about 1 cm (1/3 inch) thick and 30 cm (12 inches) long.
Width will vary...no worries.

3.  In a medium bowl cream second amount of butter, brown sugar and cinnamon together.  

*** at this point I put muffin liners into a muffin tin.  Its easier for me.  You can just grease a muffin tin if ya like.  

4.  Place 1 tsp of filling mixture into bottom of each muffin liner or tin.  Spread remaining mixture onto the dough rectangle.  Sprinkle with the raisins or currants if you like these.

5.  Roll dough up length ways like a jelly roll.  Mark first with knife 12 even lines/spaces for the rolls.  Cut.  Place cut side down into muffin pan.  

6.  Bake in 400 degrees oven for 20 - 25 minutes.  

7.  Let cool 10 minutes in pan once removed from oven.  Remove from muffin tins.  

ENJOY!!!!  with a coffee is really good.  


Monday 28 October 2013

Choco-Chip-Pretzel-Candy Corn Cookies


Ok, as the name above may show....I MAY have gone a bit overboard with these cookies...BUT it WAS WORTH IT!  I like regular Choco-chip cookies....but  I wanted some more.....how you say.....layers to the cookie....Some depth....a little sumpin sumpin....if ya know what I'm sayin'


Sooooo, I looked in my cupboards...and discovered that HEY!   I have pretzels......I have Candy Corn!!

What is with Candy Corn anyways?  It's kinda just a sweet blob of sugar.....3 colors in the shape of a triangle.....maybe its an older generation thing.....or an American thing?

Anyways, I had some in my cupboard (for nostalgia's sake...or maybe for my American friends sake...) So I thought I would add them to my cookie creation!  And they are gooood!  So to celebrate the up-coming gorge ourselves with our children's hard worked for candy.....after they go into a sugar induced-come on the 31st....here are my cookies....

Enjoy!


Choco-chip-Pretzel-Candy Corn Cookies


What you Need:

2 1/4 cups of all-purpose flour
1 tsp of baking soda
1 tsp of salt

1 cup of butter or margarine softened
3/4 cup of granulated sugar
3/4 cup of packed brown sugar
1 tsp of vanilla extract
2 large eggs

1 1/2 cups of semi-sweet chocolate chips
1/2 cup of Candy Corn chopped
3/4 cup of chopped pretzels.

What you Do:

1.  In a small bowl combine flour, baking soda, and salt.  Set aside

2.  In a large mixing bowl beat butter and sugars together until fluffy.  Add vanilla and eggs one at a time. Beating after each addition.

3.  On a low speed, slowly add dry ingredients to wet, until combined.  Add chocolate, candy and pretzels.  Stir to combine.

4.  Drop cookie dough by rounded tablespoon onto an un-greased baking sheet.

5. BAKE for 9-11 minutes or until golden brown.  Cool on baking sheet for a couple of minutes and then remove to cooling racks.

ENJOY!!!


Saturday 19 October 2013

Pumpkin Loaf with Maple Glaze


We are full on into October!  I am so thankful that there is no snow yet.  :)  When you live up as north as we do you are grateful for everyday that is snow-less.

So I've got my Pumpkin everything groove on.  I made these lovely Pumpkin Spice Meringue cookies a couple of weeks ago.  They were GOOOOOOD.  Though Auntie Evelyn wasn't so sure about them.  Oh well.  I had requests to bring them for Thanksgiving dinner. 

Funny thing about Thanksgiving dinner....No one made Pumpkin Pie.....Thank goodness I had a slice left at home.  David and I enjoyed it with a glass of red when we got home.

This past week I decided that I still haven't had enough pumpkin in my life and one MUST go overboard in this area....So I made this delicious Pumpkin Loaf with Maple Glaze.  The glaze is a must!!!!!!  Totally adds to the loaf.  The loaf is good on its own....It's my mom's recipe!!!.....but made stellar with the glaze.

So we must continue the Pumpkin TRAIN!!!!  October is only half over....


What happens in Novemeber?  We transition to chocolate???

ANYWAYS!

Pumpkin Loaf with Maple Glaze


What you Need:

1 1/2 cups of all-purpose flour
1 tsp baking powder
1 tsp baking soda
1 tsp cinnamon
1/2 tsp salt
1/2 tsp cloves
1/2 tsp ginger
1/2 tsp nutmeg

3/4 cup of granulated sugar
1/4 cup of corn syrup
2 eggs
1/2 cup of oil
1 cup canned pumpkin puree

Glaze:

2 TBSP of butter or margarine
1/4 cup of maple syrup
1 cup icing (confectioner's) sugar


What to do:

Loaf

1.  Beat sugar, syrup,oil, and eggs in a large bowl.  Add pumpkin puree, and beat to combine.

2.  In a smaller bowl, combine all dry ingredients.  Stir to combine.

3.  Add dry ingredients to the pumpkin mixture and combine well.  But don't over mix.

4.  Pour into a greased loaf tin and bake in a  pre-heated 325 degrees F. oven.

Bake for 60 minutes.  Check for doneness by inserting a wooden skewer into middle of loaf.  If it comes out "clean" it is done.  If it comes out with a bit of batter on it, continue to bake for 5 minute intervals until the skewer comes out clean.

Let cool in pan 10 minutes.  Remove from loaf pan.  Let cool.

Make glaze:

In a small saucepan, melt butter and maple syrup over medium heat.

Remove from heat and whisk in the icing sugar.

Pour over Pumpkin Loaf.

You may want to let the glaze harden, but one is more than welcome to slice the loaf with warm drizzly glaze running down each slice...Mmmm.  I think a cup of chai tea would go lovely with this.....I'm gonna go brew a mug.  Enjoy!


Sunday 13 October 2013

Family Life Recipes #3 - Being Thankful for the Seen and Unseen Blessings

It's Thanksgiving up here in Canada!  The sun is shining, the air is crisp and I am extremely thankful that there is NO SNOW!  Chicken soup is simmering on the stove, pumpkin bread in the oven....prepping for the family gathering that will come.  All the while....I'm in a reflective mood.  Reflection is good....especially when its in the spirit of THANKFULNESS.

This past week has been especially busy and stressful for me.  Most of it was good stress: getting to skating lessons, swimming lessons, subbing, getting kids to school....the usual good stuff.  We also celebrated our 13th wedding anniversary and had a family photo shoot.  ALL GOOD STUFF.  Thrown in there was a bit of not so good stuff....An un-expected to deal with NOW situation....

BUT

I'm in a spirit of Thankfulness....

This week I saw God's blessings in my life.....Woven through it like a tapestry of LOVE for ME!  ME!  Even in my faults, my failures....He showered me with CARING.

I reflect on the SEEN Blessings of this week.

1.  All events were made to in good time.  The boys LOVED their first skating lessons and even started to stand up on the ice for a few seconds....(instead of swimming and licking the ice...)

2.  The week was filled with caring words, understanding, encouragement, and LOVE from my Best Friend, and Love of my Life.... My husband.

3.  On our photo shoot day:  it was forcasted miserable weather.  So I prayed, and asked my friends to pray...for this was going to be our only chance...And I was soooo looking forward to doing it.  As we drove out to our location it was cold, and drizzly....THEN...IT HAPPENED!  Sunshine, warmth, perfect lighting for our family photo shoot!  GOD answered my little prayer!  FOR ME!  Because HE cares about the little things.


4.  Friends were helpful this week and kind words sent through emails, texts, and actual  words I heard.

5.  In the Yucky situation I had.....I made it through...and provision was there....waiting...A HUGE BLESSING.  GOD KNEW what I needed!!!!!

Now, it may sound like...WOW...God will just make it all go away, or fix anything...Not so.  Yes, this week I saw HIS BLESSING.  But I know as I have muddled through situations He has also allowed me to learn through natural consequences, and prayers that may not have been answered as I thought they should.  BUT, even in these things....the UNSEEN BLESSINGS....our lives our being woven into a masterpiece...filled with threads that may be rough, or cut, or re-tied together....not always perfection.... but WOW, when we look at where we have come from, what we've been through... You always see a thread of perfection....

GOD's LOVE, MERCY, and GRACE.  

THANK YOU....

Monday 7 October 2013

Pumpkin Spice Meringue Cookies


So have you ever had a day where none of your baking turns out like you want it too?  I did recently...I was so ready to jump on the pumpkin bandwagon.  SO READY!   So I scoped out my favourite bloggers, picked a couple of recipes.....

Made said recipes, with high hopes and wonderful aromas filling the air...

Took out said recipes.....

NO FLAVOR!!!!

I was like...WHAT?  I don't get it!  My house smells great....but when I bit into my pumpkin inspired cookies....NO PUMPKIN FLAVOR!

I was so disgusted...I threw them away.  Ugh...

Well I was ready to try again.  And with Canadian Thanksgiving right around the corner...I knew I had to get something right..like NOW!

And this is THE Thanksgiving recipe !!!!

I"ve never made meringue cookies before and I've always wanted to try.  So easy!  I bit into these crispy, melt in your mouth pumpkin spicy morsels and sighed with happiness and ate 2 more to make sure I wasn't dreaming...They are good!  With a cup of coffee....perfection!

So surprise your friends this Thanksgiving with a spicy treat that epitomises FALL!

Pumpkin Spice Meringue Cookies
adapted from: Eat, Drink, Love

What you Need:

4 egg whites
1 cup super fine sugar*** (see note)
1 1/4 teaspoon of pumpkin spice
1/2 tsp of cream of tarter

*** You can easily make super fine sugar by putting a cup of regular sugar into your food processor  for 30 seconds to a minute.  I did mine in my Magic Bullet.

What you DO:

1. Beat egg whites in a large glass bowl with the whisk beater until they are foamy.

2.  Add sugar slowly as you beat eggs.  Beat until well - mixed.

3.  Add Cream of Tarter and pumpkin spice.  Keep beating on a medium to medium high speed until you get a glossy shine on egg mixture and can hold a stiff peak when you lift the beater out.

4.  Pre-heat oven to 200 degrees FLine cookie sheet with silicone mat or parchment paper.

5.  Spoon egg white mixture into a piping bag with your choice of tip.  (you can also just dollop the mixture onto the cookie sheet with a spoon as well)
6.  Pipe mixture onto baking sheets.  Bake in oven for 2 hours.  Try not to peek at cookies as they bake.  

7.  Remove and cool.  Eat them up!!!  Happy Thanksgiving Everyone!


Monday 23 September 2013

Crispy-Baked Sweet Potato Fries!!!!


When I was first married I wasn't the best cook.  One time by poor husband had to eat the same stew for supper, then lunch the next day, then supper, then lunch.....yah, we had a talk about leftovers after that...

It wasn't until we got cable that my cooking improved.  Food Network!!!  I finally saw how food was supposed to look and taste.  I started trying new things, with some successes.  Then a friend told me about Kraft Canada's "What's Cooking" magazine.  It's a free quarterly magazine that gets sent to your home.  It is full of easy to make recipes!.  I remember that with the first magazine I received I tried almost all the recipes.  My husband was getting happier!!!

So several years later I still look forward to receiving my "What's Cooking" magazine!  This fall's edition is full of amazing recipes!  I've circled and highlighted at least a dozen!  Wahoo!!!  So here is one that I just had to try.

Crispy-Baked Sweet Potato Fries.  OH MAN, OH MAN!!!  So easy, and yet soooo tasty.  Dip the fries in a garlic aioli sauce (think Costco) and your taste buds are in HEAVEN!!!!!  So ya, go out and buy some Shake and Bake.....You'll thank me....and your family will thank YOU too.


Crispy-Baked Sweet Potato Fries
adapted from: Kraft Canada

What you Need:

2 yams or 3 sweet potatoes
3 TBSP of canola oil ( or any light tasting cooking oil)
2 eggs
1 pouch of Shake and Bake Extra Crispy
1/4 cup of fine crumbed bread crumbs

What you Do:

1.  Pre-heat oven 425 degrees F.

2.  Cover two baking sheets with tin foil.  Drizzle with canola oil.

3.  Peel potatoes (or yams) and cut into match-like sticks length ways

4.   Whisk eggs in a large bowl and add cut potatoes. Toss to coat.

5.  Empty the pouch of Shake and Bake into separate bowl.  In small batches add the potatoes into Shake and Bake; toss to coat.

*** about half-way through you may find the that Shake and Bake Coating mix starts to get clumpy.  Add the breadcrumbs into the bowl and stir mix.  This will make the coating mixture not as clumpy and you can get a nicer coating on your fries.

6.  Spread potatoes onto prepared baking sheets.  Bake until potatoes are tender-crisp, and golden brown.  Turn fries every 10 minutes and rotate baking sheets if you have one on a higher level than the other.

7.  Serve with a Garlic Aioli Sauce, or ketchup.  Enjoy!  I know I sure did.


Monday 16 September 2013

Tortilla Pizza


BASIL!  I LOVE BASIL!!!

Especially with late summer tomatoes.

Yep, a combo made in heaven....

especially on a pizza......

This here pizza is one of the easiest pizzas you can make.  David and I both love this one...which is amazing as there isn't a stitch of meat on it.  OH MY!  Ok, we are not vegetarians by any means, but this pizza doesn't need meat to make it outstanding!

It starts off with a tortilla as its "crust". So perfect on a rushed week night, or when some friends pop over unexpectedly  (come do that and see if we make this for ya....I dare ya....)  Anyways,  You put a tortilla on a pizza pan.  Smear some olive oil on top, top with very simple toppings, and 10 minutes or so in the oven you got an amazing appetiser or supper dish at your hungry fingertips...hmm... I mean....

Just eat it already!!!!!

Tomato and Basil Tortilla Pizza
adapted from Kraft Canada

What you Need:

1 large tortilla (any flavor you like)
1 tsp, olive oil
1 clove garlic, minced
1/2 cup of mozzarella cheese
1-2 Roma tomatoes ( or 1 large tomato, or 1 cup sliced in half cherry tomatoes)
2 TBSP of Parmesan shredded cheese
4 fresh basil leaves, thinly sliced.
1/4 tsp of ground black pepper

What you Do:

1.  Pre-heat oven to 450 degrees F

2.  Place tortilla on baking sheet and brush with oil.  Top with all remaining ingredients EXCEPT the basil.

3.  Bake 8-10 minutes, or until tortilla is crisp and cheese is melted.

4.  Sprinkle with basil.

Enjoy!

Friday 13 September 2013

FamilyLifeRecipes #2 - First Day of School


The summer breezes may still have been blowing, but this week was back to school.  For many moms last Tuesday was full of excitement and anxiety......and watching the clock.....

Did they like their teachers?  Were there any friends in the same class?  Were they nervous? sad? scared?  Did they need me?

Believe me, those questions darted in my mind all day.  My oldest son was starting grade one and it was his first "full" day experience. I was in need of distraction... I was so thankful that it was full of friends, coffee, and encouragement.

"Cast all your anxiety on Him because He cares for you." 1 Peter 5:7

There was much "casting" on Tuesday....hourly, minutely, continually.....and that is okay.  God knows what we are trying to express to Him.  So with prayer, and friends my day went by.  At pick up time I wasn't anxious.....curious...yes.....I had given my God my prayers....He knew what I needed.

My little guy has a wonderful teacher, there are some friends in the class.....He didn't "need" me....but he smiled big time when our eyes met at the end of day bell.   I smiled back.....feeling cared for...


Monday 9 September 2013

Mustard Bean Pickles


I am amazed with my little garden!  In mid July it was totally decimated by a hail storm that covered our lawn like a winter's day.  I cried over it and didn't think it would recover....but plants are resilient....

A month and a half later I was harvesting a bounty I did not expect.  The peas didn't come out amazing....but the yellow beans....SO MANY!  And my tomatoes are wonderful.  The beets and carrots I've not harvested yet....but they too are looking good.

So to preserve my little garden's bounty I could only do one thing that would do the little miracle beans justice....I pickled them!

But not just any pickle...a family heirloom.....Grandma Ellie's Mustard Bean Pickles.  They are up there as a favorite of mine ever since I was introduced to German Noodle and Pickle Fridays.  And that was 14 years ago.......Grandma Ellie doesn't eat meat on Fridays so out comes the noodles and pickles.  And I fell in love!  These are amazing.  And pretty easy to make.  Funny thing....this is the first time I've made them....Grandma has always kept me stocked up.  :)


So here it is....

Grandma Ellie's Mustard Bean Pickles


What you Need:

5 pounds of fresh yellow wax beans, chopped into bite size pieces (approx 10 cups)

**** you may use 6-7 cans of store bought canned wax beans.  But fresh is best. You don't have to do the above step if you used canned beans.

1 cup of all purpose flour
3 cups white sugar
2 cups brown sugar
1/2 cup dry mustard
2 Tbsp celery seed
3 Tbsp mustard seed
2 Tbsp turmeric
1 tsp of salt

6 cups of white vinegar


What You Do:

1.  Cook beans for 20 minutes in simmering salted water; drain

2.  Mix all dry ingredients into large pot.

3. Add vinegar and whisk until smooth, bring to a boil on medium high heat

4.  Add beans and bring back to a boil.  Cook for 5 minutes, stirring continually.

5.  Remove from heat and immediately pour  mixture into sterilized, hot jars.  Wipe jar rims and place hot sealers on rim and tighten on sealer rings.  Let sit undisturbed for 24 hours.  Make sure that the sealers have sealed properly.  

6.  Let season for a couple of weeks and then enjoy!  Store up to a year.


Monday 26 August 2013

Homemade Applesauce


I've decided that Fall can come now.  Our weather has been so fickle.....Hot sunny for a day or two....then muggy and rainy.....mushroomy........ENOUGH ALREADY!

So yep, Fall can come now.  Cooler weather, trees changing, jewel tones, scarves, plaid, pumkin lattes, (ALL things PUMPKIN!!!), the Wishbook, The Back to School frenzy, Harvest festivals, baked ham....apple sauce....Ham and applesauce to me are a match made in heaven.  And now Heaven just got better as I made my OWN applesauce, spiced up a bit.

BUT...

I have a secret....

I've never made applesauce before....I've always just bought it..

SHOCKING and ......lazy..... I know...

Until NOW!!!  OK!!!  I never knew it was so EASY TO MAKE!!!    I'll never buy applesauce again...unless its in those cool squishy packets the boys suck up in 2 seconds flat....


Anyways, go buy, or pick apples and make this sauce. It only takes 20 minutes!  You'll thank me.  I thank myself......

Homemade Applesauce

4 apples - peeled, cored, and chopped.  (I used Gala Apples)
1/4 cup of granulated sugar
3/4 cup of water
1/4 - 1/2 tsp of cinnamon*
pinch of ground cloves

*adjust for your own liking

What to Do:

In a saucepan, combine apples, water, sugar, and cinnamon. Cover, and cook over medium heat for 15 to 20 minutes, or until apples are soft. Allow to cool.  Put in blender and pulse until a smooth consistency.

Enjoy.


Friday 23 August 2013

FamilyLife Recipes #1 - Encourage One Another and Build Each Other UP!


A totally different kind of post.....Food for the soul instead of the gullet.  Kinda something I want to do on here.  My blog, so I can :)


"Encourage One Another and Build Each Other up" - 1 Thessalonians 5:11

These words have been running in my mind a lot today.  Who needs encouragement?  WE ALL DO!  Moms, dads, and kids too!  This last one has been speaking to me.  How often have I encouraged my kids lately?  It seems like all I do is tell them what to do and not do.....No fun...  Not building up for sure.

A couple of days ago I was visiting with some moms at the park down from my street and one of my friends was telling her little guy how happy she was to be his mom.  That truly impacted me.  When was the last time I said that to my little boys?  Not for a LONG TIME.  Not good.  So I pondered this for a while.  And I made a decsion.

"Encourage one another and build each other up"

Daily.

Kids grow up fast I am realizing.  My oldest will be going to full day school in a week and a half.  And turning 6!  My youngest will be heading to pre-school....My time with them all the time is coming to an end......I need to encourage them as they move on to this new stage.  Tell them I love them and I am proud of them.  In their short-comings.....encourage and up lift.....not tear down......Encouragement is more helpful in promoting change and good behavior...(did I learn nothing from potty training ;)


So "encourage one another (your kiddos) and build them up" (today) Tell them you love being their mommy and that you are proud of them....even when they aren't perfect....especially when they aren't perfect because we aren't either.


Hugs to everyone.

Tuesday 20 August 2013

Rosemary Olive Oil Popcorn


What does Movie Night at your house look like?

Maybe it's like at my house - filled with animated cartoons, popcorn, Smarties, licorice and pop or floats....It is fun! ....BUT....

What do you wish Movie Night looked like?

A lot less cartoons?  Less popcorn mess?  Maybe minus the red dye candy and cheap chocolate?

Me....My ideal Movie Night would be a historical fiction or "based on" movie, a glass of wine, cozy blanket on the couch with my hubby and some refined snacks.....a GOOD chocolate (Lindt - Dark Chocolate with Sea Salt...fav!!!) and a savory nibbly.  Be it a hot savory dip with Multigrain tortilla chips or......a fancy-shmancy popcorn....

I do ADORE popcorn.. But I ADORE it more when its "Fancy"  I'm a bit of a snob really.  I like it with Sweet and Salty....I like it with different flavor powders that you get from the store.....I like it caramel, or covered in this...Candy Popcorn....

Or...whilst watching fancy movies...I like it this way!

Rosemary Olive Oil Popcorn

adapted from Alaska from Scratch

  • 1/4c unpopped popcorn, popped however you like to pop it!
  • 2 Tablespoons olive oil
  • 1/2 teaspoon garlic powder
  • 1/2 teaspoon chopped rosemary (fresh or dried)
  • 1/2 teaspoon sea salt
Instructions
  1. Put popped popcorn in a bowl. 
  2. In a small bowl, mix together oil and seasonings until well combined. Drizzle over popcorn. Stir popcorn until popcorn is well coated. Taste for seasoning and adjust where you like.
  3. Serve hot.

Monday 12 August 2013

Saskatoon-Blueberry Jam


Saskatoon and Blueberry season!

 One of my favorites.

 I really do go through the year in food seasons.  January is leftover Christmas cookie season, March-June - Strawberry season, July - Cherry season, End of July -August - Saskatoon/Blueberry SEASON!!!  September......Concord grapes....but we'll discuss that one later this year.

Right now  I am immersing myself in Blueberries and Saskatoons.  What is a Saskatoon you ask?  It is bluish purple berry.  It's similar to a blueberry but yet very different.  It grows wild all over Alberta and lots of areas in Canada.  For my part of the province prime picking is NOW!  And this year is a good season as the weather has been conducive to big juicy berries.

I like to combine Saskatoons with Blueberries and Saskatoons are a more hardy-seedy berry.  The blueberries combine well in flavor and add a wonderful juiciness that I love!

So as I am up to my eyeballs in both berries I am aiming to preserve as many as I can.  I do like to freeze most of my berries and then MAKE JAM!!!!

My little family LOVES Jam!  This year I've made a triple batch of my Strawberry-Rhubarb jam and now Saskatoon-Blueberry!  This is the first time I've tried this combo and I LOVE IT!  So does my husband.  You can make this jam straight Blueberry if ya like.  We like the Saskatoons in there too. 

Here is the recipe!

Saskatoon-Blueberry Jam
adapted from Bernardin

What you Need:

2 1/2 cups of crushed Saskatoons
2 cups of crushed Blueberries

1/4 cup of lemon juice
7 cups of granulated sugar
2 pouches of  liquid pectin (I like Bernardin)

What you do:

1.  Prepare canner, jars, and lids as per usual for jam (sterilising of jars and sealers, and boiling water in canner.)

2.  In saucepan stir together fruit, lemon juice, and sugar

3.  Add 1/2 teaspoon of butter to the mixture to reduce foaming

4.  Over high heat bring mixture to a full rolling boil that cannot be stirred down

5.  Add pectin to mixture

6.  Boil mixture hard for 1 minute stirring constantly

7.  Remove from heat and process jars.

Processing:

1. fill jars full of hot jam mixture to about 1/4 inch from the top.

2. Wipe edge so that the surface is clean.

3.  Top with sealer and ring.  Tighten

4.  Place in canner and process. 10 minutes.  (if you live in a higher elevation you have to add a few more minutes.  Check on line.  In my town I needed to add 5 more minutes

5. Remove from canner and rest jam jars on a towel for 24 hrs.

6.  Enjoy!  

Makes 7 - 1 cup jars.


Friday 2 August 2013

Watermelon Frosty


I've had a bit of a break on CoffeeBiscotti - 2 weeks of crazy fun and busyness.  My husband and I went on a horse back riding adventure in the mountains.  Just the two of us - no kids.  My mom and dad came up to care for our kiddos.  They had a BLAST!  Thanks Mom and Dad!

Our horse adventure was with a camp organization that does adult camps.  We ate amazing food....I DIDN'T HAVE TO COOK!, rode up in the mountains, down steep hills, over rivers, bushwacking through trees and brush...yep it was crazy but SO much fun!  Not something some people, (myself included) could see me doing.  But I embraced the adventure and had a great time.

Then we rushed home to prep for William's 4th birthday party, Pirate style.  So much fun.  We had a cake made for us which was awesome.  Thanks Erin!  So needless to say we need a vacation from our vacation....:)  But we are refreshed, and that is a good thing.  :)


The long weekend is upon us and thankfully the weather is cooperating! Yahoo for heat and sun!!!  I have an abundance of watermelon left over from the party....so off to my favorite blog sites to see what I could do with it.  JACKPOT!  A cold drink to sip on the deck!  This frosty drink is simple to make and tastes amazing!  It would be great as a breakfast smoothie as well.  Hmmmm....tomorrow.....:)

Enjoy!

Watermelon Frosty
adapted from: Run to the Kitchen

What you Need:

  • 2 cups frozen watermelon cubes
  • ½ frozen banana
  • 1 tablespoon of lime juice
  • ½ tablespoon honey
  • 2-3 leaves of mint
  • 1/3 cup of vanilla yogurt
  • 1/4 cup of milk
What you Do:

1.  Combine all ingredients and blend in blender.  Garnish with more mint.  Enjoy!


Tuesday 16 July 2013

Double Chocolate Chip Cookies

Ahhh Chocolate!

Oh how I adore ya, let me count the ways...103,104, 105,....okay, I'll not get too carried away here.  But I am very excited about this recipe!

And I mean EXCITED!!!  It excites me because it is a wonderful, chewy, moist, chocolatey, easy to make cookie that my family LOVES!

PERFECTION!!!

It excites me because I have such a hard time finding new cookies my guys will eat....so when one comes along...its golden baby....GOLDEN!

So if you are thinking ahead and planning your lunch box menus for the coming school year....You mean you aren't planning.......your......lunchbox menus?  OK, awkward.....

Make these cookies!!! Nuf said.

 What you Need:
  • 1 cup plus 2 tablespoons butter at room temperature (2 1/4 sticks)
  • 1 cup sugar
  • 1 cup light brown sugar
  • 2 eggs
  • 2 teaspoons vanilla extract
  • 2 1/2 cups  all-purpose flour
  • 3/4 cups unsweetened cocoa powder
  • 1 teaspoon baking soda
  • 1/2 teaspoon salt
  • 12 ounces chocolate chips (about 2 1/2 cups)
What You Do:

 1.  Preheat oven to 350 degrees F. Then, line two baking sheets with parchment paper.

 2.  Add butter and sugars to a large bowl, turn a hand mixer to medium speed and beat until creamy, light and fluffy. 
 3.  Add one egg, then turn mixer to medium and beat until well incorporated. Add the second egg as well as the vanilla extract and beat until they are well incorporated. 
4.  In a separate bowl, combine the flour, cocoa powder, baking soda and the salt with a whisk. Whisk to combine.

5.  With the hand mixer on low, slowly add the dry ingredients to the wet ingredients, scraping down the sides of the bowl as needed. The cookie batter will become very thick. You only need to mix until everything has combined.

6.  Add the chocolate chips to the batter and stir to combine.

7.  Drop cookie dough by rounded table-spoonfuls onto baking sheets.  Bake 9 to 12 minutes or until the cookies have puffed a little and the tops are dry. 
8.  ***Cool on baking sheets for 5 minutes then transfer to a cooling rack and cool completely.


Wednesday 10 July 2013

Quinoa Bean Salad


I am sooo enjoying this summer so far.  The weather has been mostly cooperative and we have been able to enjoy our backyard with friends and family!  We have already used our patio set  more than we ever did last year.  So cool!  My favourite part is that it hasn't been overly windy!   YAHOOO.  All Northern Albertans nod your heads..."Oh ya".

Ok, enough with the silly cheer leading thingy.....Anyways.  I do enjoy entertaining and serving summer foods such as salads.  But not just the same ol same ol....The ornamental green salad that is on the table and no one cares to eat kind.  I like to make fun ones with fruit in them or Doritos... yep, click and see the Cauliflower Taco salad!  Or my Layered Salad With Basil Dressing  Also tasty!

So this past week I made spin on a bean salad with the added protein goodness of Quinoa.  The wonder food....something about all its protein......I'm not a nutritionist...  Anyways, we had friends over and we rotisseried a chicken.  I wanted a hearty salad to be the side.  Something filling and satisfying.  This salad fit the bill!  Went great with the chicken and baguette we had!

Quinoa Bean Salad

What you Need:

1/2 cup white quinoa
1 cup water
1 can of green beans
1 can yellow wax beans
1 can (19 fl oz/540 mL) chickpeas (garbanzo beans), rinsed
1 can (19 fl oz/540 mL) kidney beans, rinsed
1 red pepper, chopped
1 cup finely chopped red onions
1/2 cup finely chopped fresh parsley
1/2  - 3/4 cup Sun-Dried Tomato & Oregano Dressing or an Italian Dressing


What to do:


BRING water to boil in small saucepan; stir in quinoa. Cover; simmer on medium-low heat 15 min. or until liquid is absorbed. Cool.
COMBINE remaining ingredients in large bowl. Stir in quinoa.
REFRIGERATE 1 hour.


Wednesday 3 July 2013

CoffeeBiscotti : Reflecting....

CoffeeBiscotti : Reflecting....: This past week I have been away with my little family to a reunion of sorts. A good yet sad reunion.  This past April my Grandpa George ...

Reflecting....


This past week I have been away with my little family to a reunion of sorts. A good yet sad reunion.  This past April my Grandpa George passed away at a good ol age of 94.  He was an amazing man. Generous, thankful, kind, hard working, happy and full of praise and prayer.  We were able to celebrate his life this past weekend on a bright sunny day with almost all his family.  It was beautiful to reflect on a Grandpa, Dad, and Uncle who impacted so many people.

I was surrounded by family and when families are together there is always food.  My Grandpa loved good food..... We had a big bbq and fellowshiped together and ended the night with a sing song of some of Grandpa's favorite songs and hymns.  I loved it.

Later that night my mom and sister in law Heather were together sipping on some tea and nibbling on some candies and cookies.  My Grandpa had such a sweet tooth.  He had a specific drawer that all us grand-kids knew about....and it was always full.....of hard candies, licorices and caramels.  :)  As we were visiting and reminiscing, my Mom pulled out a bag of "Toasted Marshmallow" from the Nutty Club.  This was one of my Mom's dad's favorite treats.  Now my Grandpa Ernie passed away almost 30 years ago and I didn't get to know him well, so it is always cool to hear about him.  Mom pulled out these candies and shared them around.  They were really tasty.  She said he liked them cold....so into the freezer they go!

The next day I found a couple of bags of these treats and bought one for my mom and one for me.  I have been enjoying them and thinking about how a simple treat can cause a person to remember something or someone special.  When I got home I needed to refill my cupboards and fridge and to my pleasant surprise my grocery store carries these treats...They've always been there....I just didn't "see" them.  Now I will and remember my Grandpa Ernie and a memory shared with my mom.


Friday 21 June 2013

Fresh Spearmint Iced tea

 Yes, I watch Duck Dynasty.......I admit it.  I tried hard to resist, as I was afeared that my IQ would drop drastically (can't afford drastic...believe me) that and my Red Neckian Northern Albertan neighbours would say that they were slowly drawing me into their clutches!  Alas I did wear plaid this past fall but in my defence...IT WAS IN STYLE!!!

Anyways, I say all of that to say this....they drink an awful lot of "sweet tea" on that show. I would too if I live in Louisiana.  And as it is the season of sun and I do really like tea (hot or cold) I discovered this new recipe that I had to try.  My spearmint plant drove me to this recipe as it was growing out of control.  But hey, now its gonna be real short....really short as I LOVE this iced tea!


This recipe is a blend of fresh herbs, spices, and black tea.  A wonderful combo that will brighten your day.  So let's get making some tea.  Si would be proud.....;)


Spearmint Iced Tea
- adapted from Emaril

What you Need:

1 cup of fresh Spearmint leaves
2 Orange Pekoe Tea bags ( I love Tetley)
5 whole cloves
1/4  cup of sugar
4 cups of boiling water.

What you Do:

1.  Boil water in your kettle.

2.  In a heat resistant bowl or saucepan place spearmint, tea bags, cloves and sugar.  

3.  Pour in water and steep for 5 minutes.

4.  Strain solids.

**You can drink this tea hot if ya like.  It is delicious!  But if ya like and iced tea, cool tea in fridge.  When cool, pour over ice in a glass and savour!

Friday 14 June 2013

Retro Raspberry Molded "Salad"/Dessert


I love to look at "vintage" cookbooks.  I am always amazed at how people back a generation or two really seemed to like veal, weird meat parts, mayo, and ANYTHING jellied!  And of course if it is jellied.....it was automatically a "salad". 

 I just don't get it....to me Jello means dessert!  Jiggly red jello and strawberries,blueberries and lots of Cool whip.  Funny, when you cooking with kinda "fake" food ya go for fake whip cream....Love Cool Whip...shhh.  Must be a 70's child thing.  That and green Tupperware...I recently discovered that my Mom-in-law has a green Tupperware Jello mold and I of course asked if I could borrow it for a bit to try out some of my vintage recipes... ( I really should stop using the word vintage - I was born in the 70's...eek)

ANYWAYS!  This is my take on a "Jello Salad"/DESSERT!  Raspberries, Cool whip, Jello, and marshmallows. Need I say more?  Break out your peace signs and flowers my peeps and embrace your inner hippie!  Peace Out Man!

Retro Raspberry Cream "Salad" - DESSERT!
adapted from Company's Coming


What you Need:

1 - 3oz (4 serving) size Raspberry Jello
3/4 cup of boiling water
1/4 cup of sugar
1 cup of frozen raspberries (thawed)
1 cup of Cool Whip (thawed)
1 cup small plain marshmallows

What you do:

Dissolve jelly powder in boiling water in medium bowl.  Add sugar.   Stir to dissolve.  Add raspberries and stir.  Chill until "syrupy" (about 1/2 hr).   Fold in Cool whip and marshmallows.  Pour into mold or bowl and chill. (about 5 hours)

To dislodge the jelly dessert - place mold in pan of hot water for 20-30 seconds.  It will easily turn onto the plate.  Enjoy!!!


Friday 7 June 2013

Strawberry Lemonade!!!!


Ah summertime....almost....:)  My family and I enjoyed our first campfire with Smores a couple of nights ago. Such a wonderful time watching the boys play Pirate-Robots and imagining that they were "off to save the day!"  My husband and I laughed and laughed as they tried to use sand shovels to "row" their "boat" (camp chairs in the lid of their sandbox)  tooo funny.  Wish I had my camera out for that one.  David and I sat by the fire, sipping a beverage and roasting marshmallows.  It was such a great night!

Summer beverages....I love them all!  Gotta stay hydrated....and just drinking water can be kinda boring...SO...Throughout the summer I make big jugs of sun tea, juices, iced coffee, and of course....lemonade!

 I love Lemon lemonade, Vanilla Lemonade (see my post on that one!), and a new favorite....Strawberry Lemonade!  Yes it sounds fancy schmancy.....but it is soooo easy to make!  A lovely sipper on a hot day.  The strawberries sweeten up the drink, yet the lemons make sure that there is still that tang that everyone loves.  My William LOVES this drink!


Strawberry Lemonade
adapted from Alaska from Scratch


What you Need:

    For the Simple Syrup:
  • 2 cups water
  • 1 cup sugar
  • For the Strawberry Puree:
  • 2-3 cups hulled strawberries (fresh or frozen)
  • 1 cup cold water
  • For the Lemonade:
     
  • 1 cup lemon juice
  • 1 cup cold water
  • ice
  • lemon slices and sliced strawberries, optional

Instructions
  1. In a saucepan over high heat, mix together the water and the sugar. Cook until the sugar dissolves and it becomes a clear syrup. Remove from heat and set aside to cool. 
  2. Add the strawberries and the 1 cup cold water to a blender. Puree.
  3. To a half-gallon (2L) pitcher, add the lemon juice, 1 cup cold water, ice, and lemon and strawberry slices, if using. Stir in the strawberry puree and the simple syrup until well combined. Taste for sweetness and add more cold water if needed. Refrigerate to chill through or serve over ice.
You can strain the seeds and pulp out if ya like.  We like our "thick".  Also, try adding some sparkling water to add some fizz.  Any way you try it this is a good drink!!!


Thursday 30 May 2013

BBQ Meat Rub


The weather is warming up and we thankfully had no snow for Victoria Day Weekend.  :)  (always good!!!!)  So BBQ season is definitely going strong.  At our house we have a natural gas bbq that is on a covered deck, so we run it all year long.  LOVE grilling steaks in the middle of winter when everyone else is eating meatloaf...heehee....

But there are lessons to be learned in grilling.....Here is one that David and I have recently discovered.....Meat RUBS!  Apparently this is a very important thing in grilling. This element is sprinkled and massaged into the meat before cooking.  You can "do" the rub early and have the meat "marinating" beforehand if ya like.  And there are as many rub combinations as there are bbq sauces....and we all know how many of those there are!!!  So we have had the opportunity to try out a few different rubs, some too salty, some too hot, too peppery...etc.... but THIS rub!!!!!  THIS RUB is NOT too hot or spicy, or salty....it is REALLY GOOD and flavorful.

Rubs are very easy  to make on your own.  No need to buy expensive gourmet ones.  You could easily put together a rub with spices that you have on hand.  The main components to rubs are Sugar, spices, and salt.  We store ours in a mason jar and use as we like on all our meats.

This rub we have used on Beef, Poultry and on Pork.  Sprinkle as you like.  We do a liberal sprinkling and massage it into the meat.  We then cook meat as required and sauce later in the cooking process.

BBQ Meat Rub

What you Need:

  • 1/2 cup paprika
  • 1/3 cup brown sugar
  • 3 tablespoons garlic powder
  • 3 tablespoons onion powder
  • 2 tablespoons oregano
  • 2 tablespoons salt

What you Do:

Combine all ingredients and mix well. Work into the surface of the meat. This rub may be stored in an airtight container in a cool, dark place.

 ***If you like some heat add some cayenne pepper....add by 1/4 teaspoons till you reach your desired "hotness"